
Most of the trim we sell at Quality Automotive Trims goes on with 3M automotive-grade acrylic foam tape instead of drills or clips. That makes it a job most owners can handle in a driveway or garage. But November changes the rules a little. Cold panels, damp mornings and road grime all work against tape, and tape is the only thing holding your new trim to the truck. Here is how to get a clean, lasting install when the weather turns.
Why temperature matters more than you think
QAA's own installation guidance is simple: work in a clean area above 65°F. Notice that it is the surface that matters, not just the air. A truck that sat outside overnight can have door and pillar panels much colder than the garage it just rolled into, and foam tape grips a cold panel poorly.
On a cold day, pull the vehicle into a heated garage and give it time to warm up before you start. If you don't have a heated space, wait for a mild, dry afternoon and work in the shade, out of the wind. Skip the job entirely if rain, frost or heavy dew is on the way.
What you'll need
- A soft, clean cloth (two is better, one for cleaning and one for drying)
- 3M adhesive cleaner or a similar surface prep cleaner
- Masking or painter's tape for marking positions
- Your trim kit and its packed instructions
Handle each piece carefully. Thin trim can bend or scratch if it's dropped or flexed, and a bent piece won't sit flush no matter how good the tape is.
Step 1: Clean like you mean it
Winter grime and old wax are the main reasons stick-on trim lifts. Wash the area, let it dry completely, then wipe the exact mounting spots with adhesive cleaner. The tape needs to bond to paint or trim, not to dirt, wax or a film of road salt. Once a spot is clean, keep your fingers off it.
Step 2: Dry-fit every piece first
Unpack the whole kit and match each piece to its position on the vehicle using the product photos before you peel a single liner. On many QAA kits the 3M tape comes already applied to the back, and the Specs tab on each product page tells you how that kit mounts. Leave the liners on while you test the fit.
Hold each piece in place and mark both ends with small strips of masking tape. Writing the position on the liner (left rear door, right front pillar, and so on) saves a lot of second-guessing on kits with six or more pieces, like many pillar post trim sets.
Step 3: Peel, align and press one piece at a time
Work on one piece at a time. Peel the liner, line the piece up with your marks, and set it down in one motion. Then press firmly along the full length and run a fingertip down both edges so the tape bonds evenly. Step back after each piece and compare it with the pieces already on and with the product photos.
If a piece won't sit flush during the dry-fit, stop and leave its backing on. Call us at 877-752-3811 and we'll help you sort it out before the tape is committed.
Step 4: Give the tape time before the car wash
Foam tape keeps building its bond after you press it on, so don't head straight to the car wash or out into a downpour. Follow the cure time in the instructions packed with your kit, and keep the vehicle warm and dry for as long as you can after the install.
Good first projects for cold-weather installs
Some parts are easier than others when you're working in a garage on a chilly day:
- Door handle covers are small, quick to align and easy to warm up.
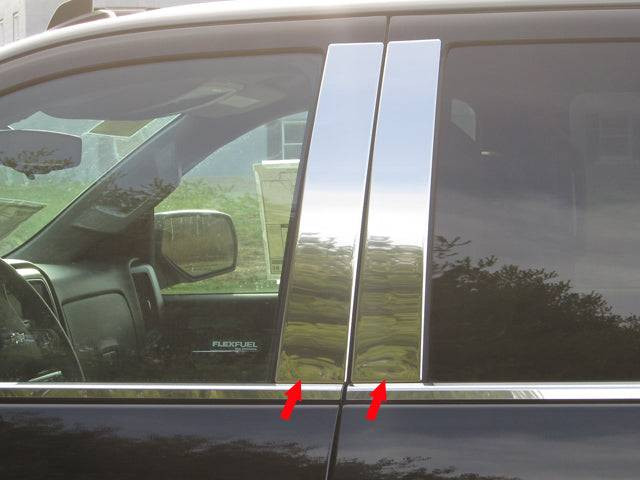
- Pillar post trim, like this 4-piece Silverado and Sierra kit, goes on vertical surfaces at a comfortable working height.
- Window sill accents follow a clear line along the glass, which makes alignment easy to judge.
- Rocker panel trim sits low where salt and slush collect, so it pays to clean that area extra carefully and save it for a warm, dry day.
Not sure which finish fits your build? Browse our stainless steel trim along with the chrome and black options under Shop by Finish.
Check your fitment before you order
Every listing has a Fitment tab with the year range, model and body style. All three have to match your vehicle. If you're unsure, call Quality Automotive Trims at 877-752-3811 with your year, make, model and body style.
Shipping is free to the lower 48 states. Orders to Alaska and Hawaii ship for a flat $49 per order and Puerto Rico for $50. We don't currently ship to Canada or internationally.